ShopDreamUp AI ArtDreamUp
Deviation Actions


Suggested Deviants


Suggested Collections


You Might Like…


Description
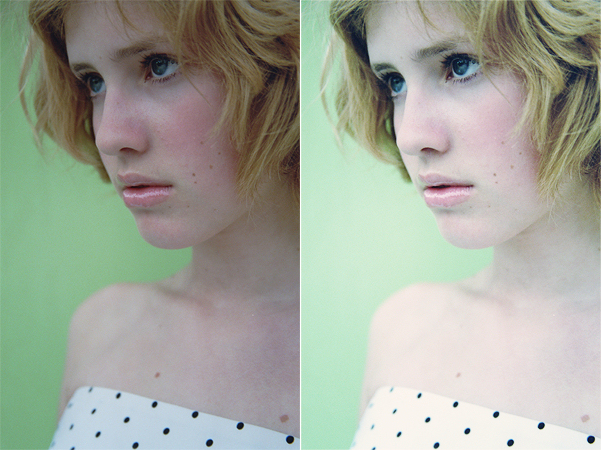
i will be using photoshop cs2 for this tutorial.
1. first, pick your image. i will be using the one above, taken from *yellow-stock's gallery.
2. duplicate your background layer, and set it to screen at 70%.
3. create a new raster layer and fill it with the colour #8CE3FF. set it to soft light at 100%.
4. duplicate your background layer and drag it to the top. set it to soft light at 100%.
5. go to layers > new adjustment layer > photo filter. check filter, and select warming filter (85) from the drop-down list. set the density to 25%.
make sure 'preserve luminosity' is checked.
6. now duplicate your background layer and drag it to the top. set it to overlay at 15%.
now merge your layers and you're done!
if you image doesn't look similar to the one above, play around with the settings until you're happy.
Image size
601x450px 343.51 KB
© 2007 - 2024 rocketlaunch
Comments17
Join the community to add your comment. Already a deviant? Log In
thank you ^^